When knitting intarsia, blocks of color are worked with separate
balls or bobbins of yarn, producing a sweater only one layer thick.
Before starting to knit, wind each color onto bobbins, so you will
not be carrying yarns across the back of the sweater.
If large balls or long strands are used, it won't take
long before the yarns become tangled.
It is well worth the time it takes to wind bobbins, which you can
keep up close to your work.
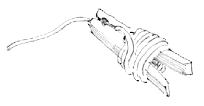
You can purchase knitting bobbins, but we prefer to buy bags of
wooden spring clothes pins, which are inexpensive in bulk, and easy
to wind and unwind.
If you are knitting intarsia for the first time, we strongly
suggest that you practice with some scrap yarn before beginning
your project.
You will find knitting your sweater much easier if you
use a Knit Count, to keep track of rows as you knit. Another item
we consider essential is a Chart Guide, to keep track of the
current row of your pattern. We currently use a magnetic board made
by LoRan to track the row on the pattern.
When tying one color to another, tie the two ends together with a
square knot up next to the needle, leaving a 5-inch tail to weave
in when finishing the sweater.
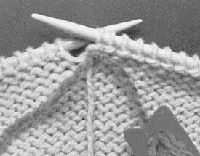
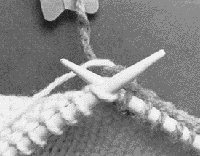
When changing from one color to another (yarns already attached)
you must always bring the new color over the color you have just
finished using. You don't want to twist the yarns so tightly around
one another that they look pinched, or so loosely that there is a
slight gap.
Twisting yarns on the knit side.
Twisting yarns on the purl side.
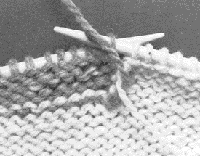
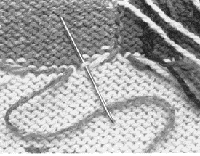
Weaving In the Ends: With the back of the sweater
facing you, thread an embroidery needle on one of the hanging ends.
Insert the needle vertically into the adjacent stitch and pull up
the yarn, closing the hole. Be sure to keep the tension consistent
with the rest of the stitches. Then insert the needle vertically
into the base of the previous stitch. Continue weaving in the same
manner for a few more stitches, then cut off the excess yarn,
leaving a half-inch tail.